In Opinew, you can integrate along with Klaviyo to track users based on how many stars they give when writing a new review, and to send review requests.
Activate the integration

Here’s how to do it:
Go to Integrations and Experts -> Integrations -> Klaviyo

Then, click on Klaviyo and select Enable Klaviyo Integration.
API Keys
Go to Klaviyo and then head to Account -> Settings -> API Keys.

After that, you’ll see both your public and private API keys. If you don’t have a private one, click on the Create Private API Key button.
There, give your key a name, select Full Acess Key and finally click Create:

Great! Copy and paste both your public and private keys on the respective fields back on Klaviyo’s integration page in Opinew:

Optional: you can add the profiles of customers who leave a review on Opinew to a Klaviyo list. This process is automatic and is completely optional. If you want to get this feature, visit this article. If not, you can leave the List ID field empty and your integration will still work normally.
Finally, click on the Save button.

Done! If you now go to your Profiles section, you’ll see the Opinew Activation profile. That means the integration is successful, and you will be able to use it for Sending review Requests and Track users who left a review. Click on that profile and the properties will show up.

If you click it, 5 Left a review on Opinew properties will display, and one for Eligible for Opinew review request.

Track users who left a review on Opinew
Once you complete the steps above and the Left a review on Opinew metric shows in the Opinew profile, users who leave a review will begin to be tracked automatically. When a new review is created, the property Left a review on Opinew will show on those users. If you click on the three dot icon on the right you’ll see useful metrics from the review.


You can create, for example, a campaign for those who left a review, or an email flow only for users who left a 5-star review based on the review star rating metric. To learn more about this, you can check this article.
Note: the property ‘Left a review on Opinew’ gets set when a customer leaves a review and not when it’s approved.
To send review requests
Review request emails can be sent from Klaviyo when your integration is active. Here’s how to do it:
Once your Klaviyo integration is active, a new option will appear in your Review Requests that will allow you to send review request emails via Klaviyo. Go to Collect Reviews -> Request Schedule and activate Send email with Klaviyo:

This will create a new property in the users that are eligible for a review request, as shown in the next section:
Eligible for Opinew Review Request property
To start sending review requests via Klaviyo, make sure you have eligible profiles that have the Eligible for Opinew Review Request property. You can check that in your Profiles section by clicking on the name of a profile.

Note: This property will be shown on the date of request sending that you can check on the review requests page. (Scheduled for column):

Great! Once you have this property, go to Flows in your Klaviyo dashboard and then click on Create Flow.

Select Create from Scratch

Then give your flow a name and click Create Flow.

The following page will show up. This is where you will create the email template for the flow. The email will be automatically sent to the user if it’s eligible. To do that, click on API.

After that in the sidebar menu, click on Eligible for Opinew review request.

Hit save and the trigger step is complete.

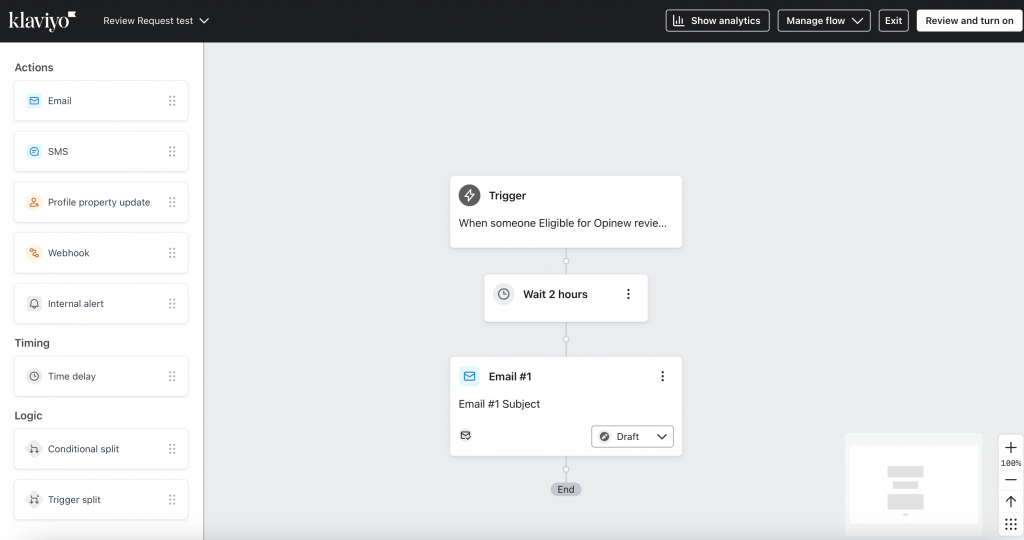
Then grab the Email action on the left and drop it below the trigger square on the left.

Click on the Email element you just dropped and then click on Select Template.

After that select a template you’d like to use, or click on Create blank email.

The email editor will then show up. Click on the text you want to edit and write the content you want on the email.

You can use merge tags you use on Opinew by clicking the Preview and Test button, and then clicking the one you want to use. A message showing that the tag is copied will show up:

To add the review request link, copy the review_request_link tag and then back on the editor click on the link icon.

Write the text you want to show and paste the tag below. Then click Apply:

Add your product image dynamically
You can also add your product’s image by copying the {{ event.items.data.product_image }} tag.

Then, start adding an image block dragging and dropping it and then clicking on Browse image gallery:

After that click on Dynamic Image and paste the image tag:

When you’re done with the email template, click Save and Exit.

You can set a time delay for the email. Just drag and drop the ‘Time delay’ option on the right and set the time you want. Then press ‘Save’.

Don’t forget to set your email to ‘Live’ for automatic send, or Manual to do it manually.

Finally, click on Update action statuses and set it Live.

That’s it! The review request email will be sent to users.